Layered omelet with ham and cheese June 18, 2008
Serves 6 Summer stretches ahead with its picnics, beach days, weekend guests, and impromptu suppers. Often that means looking for ways to feed friends and family without much fuss. This colorful layered omelet can be prepared ahead of time and refrigerated overnight. It leaves the kitchen cool and the cook unflustered. Begin by making three thin egg and scallion omelets, then layer them with a dill-flecked mayonnaise and ham, cheddar cheese, and slices of crunchy cukes. After you get the hang of it, you can experiment with thinly sliced tomatoes and fresh basil leaves, use turkey instead of ham, or replace the mayonnaise with sour cream and chives. At the table, cut the round into wedges and pass the icy drinks.
1. Have on hand a serving dish with a 9-inch flat surface. 2. In a small bowl mix the mayonnaise, mustard, and dill; set aside. 3. In another bowl, beat the eggs, salt, and white part of the scallions. 4. Heat a 9-inch nonstick skillet over medium heat. Add the oil and heat for 30 seconds. With a paper towel, wipe most of the oil from the pan. Reduce the heat to medium-low. Using a 1/3-cup measure, pour the egg mixture into the skillet, swirling it around so it covers the bottom of the pan. Let it sit for 1 minute or until it sets. Carefully slip a spatula under the omelet and flip it over. Let it cook for another 30 seconds. Turn it out onto the counter. 5. Repeat the omelet layer 2 more times, turning them out in a stack. 6. Using a small offset spatula, spread about 1 tablespoon of the mayonnaise dressing onto 1 layer of the omelet. Set it on the dish. Lay 5 or 6 pieces of cheese on top of the omelet to cover the entire surface. Add half the cucumber slices to cover the cheese completely. Then add half the ham. 7. Spread another omelet round with 1 tablespoon of the mayonnaise. Set it, mayonnaise down, on the ham. Add the remaining cheese, cucumbers, and ham. 8. Spread the omelet round with the remaining
mayonnaise. Set it, mayonnaise down, on the ham. Lay a piece of plastic wrap
directly onto the surface of the top layer. Cover the entire dish with foil and
refrigerate for at least 2 hours or for up to overnight. Sprinkle the green
scallion on top. Cut into wedges. Debra Samuels
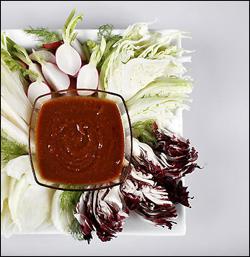
Crudite Platter with Spicy Miso Dip If you're hosting or contributing to a party and looking for an appetizer, a crudite platter is always welcome. For years, Americans had a mundane approach to this French tradition by dipping veggie sticks such as carrots and celery into ordinary mayonnaise-based sauces. Raw broccoli and asparagus spears joined the usual suspects, and bowls of Russian dressing were displaced by more complex flavors such as blue cheese or mango salsa. The look changed too. It went from toothpicked vegetables and cheese cubes affixed to heads of cauliflower - and resembling alien spacecraft - to elegant displays on silver platters or earthenware pottery. But still the veggies remained a little ordinary. This combination offers a variety of taste: bitter radicchio, buttery endive, licorice-laced fennel, crunchy red or green cabbages, and peppery radishes make a colorful display of vegetables with character. The vegetables are cut into wedges, each with a piece of core intact, which helps them hold their natural shape and provides an easy pick-up spot. For the dipping sauce, combine aka miso, the dark reddish-brown salty bean paste, with sriracha, the fiery Southeast Asian chili sauce. These are softened by honey and apple juice. Sesame oil gives the dip a toasty taste with a velvety finish. You haven't done any heavy lifting, and your dish may be the hit of the party. -- DEBRA SAMUELS
Crudite platter with spicy miso dip November 7, 2007 Serves 8 VEGETABLES
2. Wipe the radishes with a wet paper towel. Cut all but 1 inch of the green stems. Slice the radishes in half lengthwise so each piece has some stem. Quarter large radishes. Transfer to the platter. DIP
2. Transfer to a small bowl and serve with the
vegetables. Adapted from Taekyung Chung
A warming bowl
Split pea soup is just what you need when the chill goes right through your coat. In the port city of Hamburg last month, it was sunny but cold as I walked through the Isestrasse market in the center of town. German markets in winter boast stands brimming with every variety of cabbage and potato imaginable. There are mobile bakeries, butchers, fishmongers, sausage sellers, and among them, all kinds of eateries. These hearty folks aren't fair-weather vendors, I decided, so I wandered around until I found lunch. I wanted what two bundled up ladies were eating: big bowlfuls of steaming split pea soup laden with plenty of slices of knockwurst in the thick porridge. I approached the counter and used my sparse knowledge of Yiddish to ask for a bowl. That produced lots of laughing from the beefy proprietor, but no soup. I wanted soup and I was sure he would sell me some, if only he understood what I was after. I knew I shouldn't point, but point I did - at the women and their lunch. Success. I took my bowl and settled in beside them, standing in the bracing
cold coming off the Baltic Sea, with my bowl set in front of me on a high
bistro table. I sipped spoonfuls of the thick, nourishing mixture. The green
puree, with its hammy stock and smoked wurst, also had nuggets of sweet
carrots. A piece of crusty bread helped soak up every last bit. - DEBRA SAMUELS Split pea soup Serves 6 The flavor of this soup improves on standing, but it thickens. To make a day or two in advance, stir water, about 1/4 cup at a time, into the soup before reheating.
2. Add the ham hock and cook, stirring often, for 3 minutes more, to brown the hock on all sides. Remove it from the pan. 3. Add the onion and cook, stirring often, for 3 minutes. Add the split peas, and stir to coat them with the oil. Return the ham hock to the pan. 4. Pour in the water and bring to a boil. Cover the pan and cook the mixture for 10 minutes on medium heat. Remove the lid and use a spoon to skim the foam from the surface of the soup. 5. Reduce the heat to low and add the carrots. Place the cover slightly askew on the pot and simmer for 45 minutes. Stir occasionally to keep the soup from burning on the bottom as it thickens. 6. Remove the lid and add the frankfurter slices. Simmer for 15 minutes more, stirring occasionally, or until the split peas have dissolved into a smooth thick puree. 7. Remove the ham hock and set the meat aside. When it is cool enough to handle, trim the fat from the bone. Cut the meat into strips. Add them to the soup with salt and pepper. Bring to a boil and ladle the soup into bowls. Debra Samuels
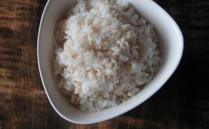
Brown and white rice with black beans October 3, 2007 Makes about 9 cups or enough to serve 9 To achieve white rice and brown rice with perfect textures, cook them separately. If you prefer to serve them separately, you'll have about 6 cups of white (to serve 6) and 3 cups of brown (to serve 3). WHITE RICE
2. In a medium saucepan combine the rice and the 2 cups of water. Cover with a lid. Cook the rice on medium-high heat for 10 minutes. Turn the heat down to low and simmer for 10 minutes or until the rice is tender (total cooking time is 20 minutes). 3. Turn the heat off and let the rice sit for 10 minutes more. BROWN RICE
2. In a medium saucepan combine the rice and the 2 cups of water. Bring to a boil, reduce heat to low, and cover with a tight-fitting lid. Cook for 50 minutes or until the rice is tender. 3. Turn the heat off and let the rice sit for 10 minutes more. BEANS
2. Tear off an 8-inch square of plastic wrap. Set it on the counter. Sprinkle the surface with salt. Lightly wet a 1-cup measure. Fill the cup with rice and set it on the wrap. Bring one end of the wrap over the rice, pressing lightly, to form a thick pancake. Continue wrapping until the rice is enclosed. Repeat with the remaining rice (each packet yields 1 serving). Freeze them in a large zipper bag. 3. To reheat: Without defrosting the packets,
unwrap as many servings as you need and place in a large microwave-safe bowl.
Cover with parchment paper. Microwave on high for about 4 minutes or until rice
is heated through. Break into the center with a fork to make sure it is hot. If
necessary, cover and microwave for an additional 1 to 2 minutes. Debra Samuels Caponata March 26, 2008 Caponata
Makes about 2 cups Caponata is the sweet, sour, and salty Sicilian eggplant appetizer that looks like a relish and often comes as one of the tastes in an antipasti course. The dish begins with sauteed eggplant cubes, which lend their deep purple color to the mixture, and is cooked briefly with chopped green olives, cherry tomatoes, and golden raisins. The tangy spread also contains vinegar, sugar, raisins, and pine nuts, a combination that reflects the influence of Arab cuisine on the Sicilian table. The classic version we have adapted here from "Treasures of Sicilian Cuisine," by Paolo Salerno et al., calls for deep-frying the eggplant, but we give it a saute in olive oil, which lends a nice caramelized taste. Celery and capers make the caponata chunky, and the final effect is jewel-like. Spoon it on slices of crusty bread or over fillets of fish before roasting.
1. In a large skillet over medium heat, heat 3 tablespoons of the olive oil. Add the eggplant and cook, stirring often, for 8 minutes or until it is softened but not mushy. Transfer to a bowl. 2. In the same skillet, add the remaining 2 tablespoons of olive oil. When it is hot, cook the celery and onion for 3 minutes. 3. Add the olives, cherry tomatoes, capers, pine nuts, and raisins. Mix well and cook for 2 minutes. 4. Add the vinegar and sugar. Let the mixture come to a boil. Return the eggplant to the pan and add salt and pepper. Turn down the heat and simmer for 3 minutes until the eggplant is cooked through. 5. Transfer to a bowl and leave to cool to room
temperature. Debra Samuels Spaghetti lasagna January 16, 2008
If there was ever a universal crowd pleaser, it's lasagna. This dish is a variation on the layers of wide noodles and tomato sauce that usually go into the dish. Here spaghetti, tomato sauce, and mozzarella cheese are stacked in a dish, then baked until the top turns golden. Cut big squares and serve with a salad and crusty bread. Bring it to football-watching get-togethers, serve it to a table of teens, or take it to a rented winter vacation house for nourishment after skiing. It can be transported, reheated, and frozen, all without harm. Serves 8
2. Bring a large pot of salted water to a boil. Add the spaghetti and cook, stirring occasionally, for 8 minutes or until the noodles are not quite tender. Strain into a colander and transfer to a bowl. With a scissors, snip the spaghetti in several places. Sprinkle with 1 tablespoon of the olive oil. Toss well and set aside. 3. In a large saucepan, heat the remaining 3 tablespoons of oil. Add the onion and garlic, and cook, stirring often, for 3 minutes. Add the tomatoes, red pepper, oregano, brown sugar, a generous pinch of salt, and black pepper. Bring the sauce to a boil. Lower the heat and simmer, stirring occasionally, for 20 minutes or until the mixture thickens. Taste for seasoning and add more salt and pepper, if you like. 4. Ladle enough tomato sauce in the bottom of the baking dish to make a thin layer. With tongs, add a layer of spaghetti, using one-third of the mixture, tucking spaghetti into the corners of the dish. Cover with sauce, one-third of the mozzarella, then continue layering, ending with Parmesan on top. 5. Set the dish on a large rimmed baking sheet. Bake for 30 minutes or until sauce is bubbling at the edges and the top is browned. Baby bok choy May 14, 2008 Serves 4 Baby bok choy, steamed with slivers of fresh garlic and plenty of ginger, is ready in about 10 minutes and produces a flavorful dish of mini green bundles. The small greens are often used in Chinese dishes as a bed for tofu or scallops, but this mild member of the cabbage family can stand on its own cute little stalks. Bok choy (in Cantonese it's pronounced pak-choi) is sometimes called white cabbage or Chinese chard. Each bunch consists of white stalks with green leaves at the top; they're entirely edible. Larger bok choy are sliced for stir-fries; the babies, each between 4 and 6 inches long, are more tender and can be served whole or halved. Both have a celery-like crunch with a mild cabbage flavor. Very young baby bok choy can even be eaten raw.
1. Halve the bok choy lengthwise. 2. In a wok or medium skillet, heat the oil over medium-high heat for 30 seconds. Add the ginger and garlic and stir-fry for 20 seconds. Add the bok choy and salt. Stir-fry for 1 minute. 3. Add the water, bring it to a boil, and cover with a lid. Let the vegetables steam for 2 minutes. Remove the lid and continue to cook for 1 minute or until the water evaporates. 4. Add the soy sauce and cook for 30 seconds more. Sprinkle with pepper. Stashing cooked rice
October 3, 2007 Watching squirrels gathering and stashing nuts for the winter reminds me of Japanese and Korean friends filling their rice cookers to maximum capacity to make small packets of cooked rice for the freezer. When it's time to eat, they microwave the rice until it's steaming hot. Recently, a Korean guest did just that. She made a mixture of short-grain white and brown rice, and after it was cooked, added black beans (at home she would have used black soy beans). With a salad and soup it is a perfect light meal with little effort. Short grain rices work best because they are sticky and hold together when packed. The cooking methods are completely different than the long grain varieties. Cook the grains separately because brown takes twice the water and twice the time of white. When the rice is done, stir both together, add canned black beans, and freeze the mixture in plastic wrap sprinkled with a little salt. Many Asian cooks don't add salt to the cooking water because it detracts from the delicacy of the rice. The little packets will be welcome on a busy day as a nutritious side dish for supper or a quick lunch at the office. When it's time to forage, just open the freezer door. Brown and white rice with black beans October 3, 2007 Makes about 9 cups or enough to serve 9 To achieve white rice and brown rice with perfect textures, cook them separately. If you prefer to serve them separately, you'll have about 6 cups of white (to serve 6) and 3 cups of brown (to serve 3). WHITE RICE
2. In a medium saucepan combine the rice and the 2 cups of water. Cover with a lid. Cook the rice on medium-high heat for 10 minutes. Turn the heat down to low and simmer for 10 minutes or until the rice is tender (total cooking time is 20 minutes). 3. Turn the heat off and let the rice sit for 10 minutes more. BROWN RICE
2. In a medium saucepan combine the rice and the 2 cups of water. Bring to a boil, reduce heat to low, and cover with a tight-fitting lid. Cook for 50 minutes or until the rice is tender. 3. Turn the heat off and let the rice sit for 10 minutes more. BEANS
2. Tear off an 8-inch square of plastic wrap. Set it on the counter. Sprinkle the surface with salt. Lightly wet a 1-cup measure. Fill the cup with rice and set it on the wrap. Bring one end of the wrap over the rice, pressing lightly, to form a thick pancake. Continue wrapping until the rice is enclosed. Repeat with the remaining rice (each packet yields 1 serving). Freeze them in a large zipper bag. 3. To reheat: Without defrosting the packets, unwrap as many servings as you need and place in a large microwave-safe bowl. Cover with parchment paper. Microwave on high for about 4 minutes or until rice is heated through. Break into the center with a fork to make sure it is hot. If necessary, cover and microwave for an additional 1 to 2 minutes. Buttermilk pancakes
Buttermilk was originally made from liquid left over after churning butter. My butter churn is next to the spinning wheel somewhere in the basement. Today, buttermilk, which has a month long refrigerator life, is made from pasteurized skim milk that is slightly fermented. The thick consistency and slightly sour taste add a light texture and tang to baked goods and salad dressings. Buttermilk is wonderful and indispensable in pancakes , but unless you make buttermilk pancakes all the time, who keeps a quart of the liquid on hand? That's where powdered buttermilk comes in . Saco makes a cultured powdered blend that you add directly to dry ingredients (as opposed to reconstituting it first). When it's time to mix the liquids you simply substitute water for milk or fresh buttermilk. You can even make your own pancake mix, which I started doing, beginning with a recipe on the Saco box and adapting it. When it's time for breakfast, take out your own mix, add water and an egg, heat the griddle, and fluffy pancakes will be ready in minutes. If you're headed to someone's summer house, the pancake mix makes a nice host gift. Package the dry ingredients in a cellophane bag and tie it with ribbon. Add a pancake recipe, a jar of pure maple syrup, a new nonstick skillet, if you're staying more than a night, and you have a practical present. It will last longer than the summer, get put to use on busy school mornings come fall, and you may be invited back next year. Makes about 10
1. In a bowl, stir together the pancake mix, water, egg, and vanilla. 2. In a large skillet, melt the butter. Turn off the heat. Take 1 tablespoon of the melted butter and stir it into the pancake batter. Let the batter sit for 5 minutes. 3. Reheat the skillet of butter until it begins to foam. With a 1/4 - cup measure, pour pancake batter into the hot pan. Cook until bubbles appear on the surface of the pancake s . With a spatula, flip the pancakes over. Cook for 1 minute more. Serve with syrup or confectioners' sugar. Buttermilk pancake mix Makes about 3 cups (enough for 20 pancakes)
1. In a large bowl blend the flour, buttermilk powder, baking soda, sugar, and salt. 2. Store in an airtight container. Adapted from Saco Cultured Buttermilk Blend Strawberry napoleon, deconstructed Some desserts, like one I was served recently in Italy, are stunning on the plate. In this case, triangles of puff pastry were set into a pool of vanilla custard sauce. Tiny strawberries were strewn around the dish, which was decorated with zig zags of chocolate. In fact, this impressive confection is a deconstructed napoleon, the multilayered classic made with three rectangles of puff pastry sandwiched with pastry cream, often with fruit, too. But when you eat this typically French sweet, your fork moves through the top layer of pastry, sending the cream oozing in all directions. So the modern Italian version was beautiful and practical. You can re-create the dish using frozen puff pastry cut into squares and making vanilla custard sauce. The sauce can be tricky. Use a heavy bottomed saucepan and don't leave the stove. A few extra seconds on the heat can give you a curdled mass. If that happens, quickly pour the custard into a blender and whir it. That may bring the sauce back. On the plate, you'll need a spoon to scrape up every bit of sauce. Unless you want to lick the plates. We couldn't do that at the restaurant in Italy. But home is another matter. Recipe Serves 6
1. Set the oven at 400 degrees. Line a baking sheet with parchment paper. Transfer the pastry to a cutting board. Set aside for 15 minutes. 2. Make 4 vertical cuts and 4 horizontal cuts in the pastry to form 25 2-inch squares. Separate the squares and return them to the sheet. Bake them for 12 minutes or until browned. Leave to cool. 3. In a heavy-bottomed saucepan, combine the milk and vanilla bean, if using. Heat over medium heat just until it is scalded. Turn off the heat and let the pan sit for 5 minutes. Remove the vanilla bean. With the tip of a knife, scrape the seeds into the milk. 4. In a bowl with a wooden spoon, stir the yolks and sugar. Slowly pour half the milk into the egg mixture, stirring. Return the egg mixture to the remaining milk in the saucepan. Cook the custard on medium-low heat, stirring constantly, until the mixture thickens enough to coat the back of the spoon. The mixture should not boil. 5. If using vanilla extract, add it now. Sprinkle the custard with extra granulated sugar to prevent a skin from forming. Leave to cool. Cover and refrigerate until cold. 6. In an electric mixer, beat the cream and confectioners' sugar until the cream forms soft peaks. Add the Marsala or sherry and continue beating until the cream is stiff. Fold half the cream into the custard sauce. 7. Pour a spoonful of sauce into each of 6 shallow plates, then add 3 squares of pastry, and some berries. Repeat the layers, garnishing with cream. Healthy and Cool Tofu Sandwich June 20, 2007 Tofu, the sensational block packed with protein that is popular in Korean, Japanese, and Chinese cuisines, is no longer exclusively available in Asian markets. Unfortunately, while the widely distributed brands like Nasoya are good, they don't have the same strikingly fresh taste as tofu from Asian grocers. When you go to pick out a variety, soft or silken tofu is good for soups or eating in its pure state with just a bit of soy sauce and grated ginger. Firmer varieties are best for stir fries and for using in dishes where the white block is cut and reshaped, as it is here. A towering version of this tofu sandwich recipe was created by a Japanese cooking teacher for a class on contemporary Japanese cuisine. In this recipe, the tofu is cut into 2-inch rounds with a cookie cutter, then layered with chopped smoked salmon and coarsely mashed avocado. On top, a shrimp half and some edamame are the garnish. The sandwich includes two rounds of tofu, rather than the tower of the original recipe. The finished dish is beautiful, healthy, and cooling, with a complex set of creamy, salty, and buttery-rich flavors. Whisk soy sauce and olive oil to make a vinaigrette that blends elements of Eastern and Western cuisines. Instead of a cookie cutter, you can also use a small can. Cut off the top and bottom and press down any jagged edges with the back of a spoon. The can will act as a mold to hold the ingredients together as you stack the intriguing layers
Recipe June 20, 2007 Makes 2 Use Nasoya or House brand tofu (the firm variety).
1. Have on hand a deep 2-inch plain round cookie cutter or any small can about the same size. 2. Place the tofu on a plate and let sit for 20 minutes to drain the excess liquid. Tip off the liquid. With the cutter, use a twisting motion to slowly cut into the tofu, making one large tofu cylinder. With a sharp knife, cut that cylinder in half horizontally. Cut each half in half again to make 4 circles. 3. With a chef's knife, chop the salmon finely. In a bowl, combine the salmon, 1 tablespoon of the olive oil, 1 tablespoon of the lemon juice and several generous twists of pepper. If the mixture seems dry, drizzle it with a little more olive oil; set aside. 4. Cut the avocado in half and remove the pit. Scoop out the flesh and place on a cutting board. With a chef's knife, chop the avocado. 5. In a medium bowl, combine the avocado with 1 tablespoon olive oil, 1 tablespoon lemon juice, salt, and pepper. 6. Place 1 tofu circle into the cutter. With a spoon, add a 1/2-inch layer of the salmon mixture. Press it evenly with the back of the spoon. Repeat with the avocado mixture. Top with a circle of tofu. Carefully lift the biscuit cutter from the stack. Slip a small metal spatula under the sandwich and transfer to a plate. Repeat with remaining ingredients. (Serve leftover salmon and avocado on crackers.) 7. Bring a saucepan of water to a boil, drop in the edamame beans. Cook for 1 minute. Drain, rinse with cold water, and pat dry with paper towels. 8. Garnish the sandwiches with the edamame and a shrimp half. 9. In a small bowl, whisk the remaining 2 tablespoons olive oil with the remaining 1 tablespoon lemon juice, soy sauce, and sugar. Drizzle a little of the dressing on each sandwich and serve the rest separately.
Salmon Mousse with Sour Cream Dill Sauce May 16, 2007 If you're hosting a crowd for a graduation party or wedding shower, you might want to turn the oven off and keep things light. Stash away the stew and lasagna recipes for fall -- it will be here soon enough. A flavorful fresh salmon mousse makes an elegant addition to the buffet table or offer it as a spread during the cocktail hour. Similar recipes to this have been around for decades and they often call for canned salmon, which was all that many cooks could buy at the time. Fresh salmon gives the mousse a subtler flavor. If you prefer canned salmon, it has to be scraped of its dark skin and picked over for bones. A skinless, boneless salmon fillet can be microwaved with lemon juice in less than 10 minutes. There is just enough gelatin in the mousse to make the mixture set without becoming rubbery. Beat heavy cream and fold it into the salmon puree for an airy texture. Then pour it into a mold before chilling. In the '50s, the mold you used would have been fish-shaped, and once turned out, slices of olives would form the eyes, thin slices of cucumber the scales, and dill fronds a tail. Today, use any ring or loaf pan, or individual molds, and skip the hokey fish theme. But scatter similar garnishes -- sliced cucumbers, quartered cherry tomatoes, and fresh dill -- around the turned-out mousse. Add a basket of sliced French bread and plain English crackers. To complete the buffet, make a crunchy grain salad, such as tabbouleh; steamed asparagus, drizzled with olive oil and lemon juice and served at room temperature; and deviled eggs. Arrange your menu on platters, tuck it all into the fridge, then hang up your apron, and join your own party. – Recipe Serves 8 MOUSSE
1. Have on hand one mold, loaf pan, or individual molds (total capacity 5 cups). 2. In a microwave-safe dish, place the salmon and 4 tablespoons of the water. Cover with parchment paper and microwave on high for 8 minutes. If the salmon is not firm, microwave for 2 minutes more. With a slotted metal spatula, remove the salmon from the dish. 3. In a bowl, sprinkle the gelatin over the remaining 2 tablespoons cold water. Set aside for 5 minutes. 4. Pour the boiling water over the gelatin mixture and stir until it dissolves completely. 5. In a food processor, combine the gelatin mixture, lemon, mayonnaise, hot sauce, paprika, onion, and salt. Pulse several times. 6. Add half the salmon mixture and pulse until smooth. Add the remaining salmon with the capers. Pulse several times until complete ly blended. Transfer to a bowl. 7. Stir 1 large spoonful of the whipped cream into the salmon mixture. Fold in the remaining cream. 8. Moisten a paper towel and wring it out. Wipe the inside of your mold or molds. Add the mixture to the mold, cover, and refrigerate for several hours or over night. SAUCE AND GARNISH
1. In a small bowl, whisk the sour cream and lemon juice until the mixture is smooth. 2. Add the sugar, salt, and dill. Cover and refrigerate. 3. To unmold the salmon mousse, run a thin-bladed knife carefully between the mousse and the mold. Invert a plate onto the mold. With your hand on top of the plate, flip the mold and plate over. 4. Dampen a dish towel with hot water; wring it dry. Place the hot towel on the mold for several seconds to loosen the contents. Give the mold a gentle shake. You should hear the mousse release. Lift the mold from the mousse. 5. Garnish with dill, cherry tomatoes, and cucumbers. Serve with French bread and sour cream sauce.
Brazilian breakfast March 7, 2007 When Sandra Silva, a native of Sao Paulo, Brazil, has a crowd for brunch at her home, she serves a dish she calls Café Brasil or Brazilian breakfast. Instead of laboriously making eggs individually, like a home-based short-order cook, she has perfected a dish that can be prepared all at once for four, slipped into the oven, and then served piping hot. And there's drama from egg whites whipped into a meringue and then lightly toasted. Ordinary Sunday brunch becomes a fiesta. First Silva slices French bread, then it is toasted and lightly buttered. A slice of cheese just covers the bread. The eggs are separated, and the whites are quickly whipped into a meringue and mounded onto the toast. The yolk stays protected in its half shell. With the back of a spoon, Silva hollows out a little indentation in the meringue and carefully sets the yolk into its airy cradle. Then she lines four, or even a dozen, onto a baking sheet and bakes until the meringue is light brown, about 12 minutes, before placing the hot breakfast on individual plates. Serve with morsels of crispy bacon. As your guests slide their forks into the yolk, it bursts into yellow rays -- just like the morning sunshine.— Recipe Serves 4
1. Set the oven at 350 degrees . Have on hand a large mixing bowl. Carefully break an egg in half and tip egg white into the mixing bowl. Keep the yolk in its half shell, propped against a cutting board, until ready to use. Repeat with remaining eggs. 2. Spread butter onto warm toast. Place toast on a baking sheet. 3. Place one slice of cheese on each piece of toast. 4. With a n electric hand beater or wire whisk, whip the egg whites into peaks. 5. With a spoon or rubber spatula scoop out one quarter of the meringue and mound it on top of the cheese. Spread the meringue all around to cover the surface of the cheese, keeping a slightly higher mound in the middle. 6. With the back of a spoon, make an indentation into the center of the meringue just deep enough to hold the yolk. 7. Slip an egg yolk into each "cradle." 8. Place the baking sheet into the oven for 12 minutes, or until the meringue is lightly browned and the egg has set. Cooking time also depends on how loose or firm you like your eggs. 9. While the eggs are baking, place bacon slices into a skillet and fry until crispy, about 5 minutes. Drain on paper towels and cut into small squares. 10. To serve: divide the bacon among the 4 plates. Set a baked meringue toast on each plate. Sprinkle with salt and pepper and garnish with a few cherry tomatoes. Adapted from Sandra Silva
|